Views: 145 Author: Site Editor Publish Time: 2026-07-02 Origin: Site


Custom mold making often involves messy liquid silicones and unpredictable curing times. Fortunately, Silicone putty offers a rapid, tool-free alternative. You completely skip the digital scales, degassing vacuum chambers, and frustrating overnight waits. Despite this simplicity, users frequently face complex issues during execution. Common problems include trapped air bubbles, rigid undercuts, or irreversible chemical bonding with expensive work surfaces. A ruined original object or permanently fused craft mat can quickly derail your entire creative process.
This guide details the exact implementation steps, physical parameters, and risk-mitigation strategies you need. We will explore how to successfully deploy moldable silicone putty for resin, clay, concrete, or food casting. By following these precise techniques, you eliminate guesswork and ensure flawless custom molds on your very first try.
Ratio & Timing: Standard formulations require a strict 1:1 volumetric mix, featuring a 3-to-4-minute working time (pot life) and a 20-to-30-minute cure time.
Material Selection: Shore Hardness (typically around 35A) provides industrial-grade durability, but formulations are strictly divided into FDA-compliant food-grade and standard craft-grade.
Critical Risk: Silicone binds chemically to silicone. Operating on a silicone craft mat without a release agent guarantees permanent adhesion and project failure.
Pro Technique: Pressing the material from the highest point downward eliminates air pockets, while using a support form (like a cut deli cup) ensures even pressure and flat leveling.
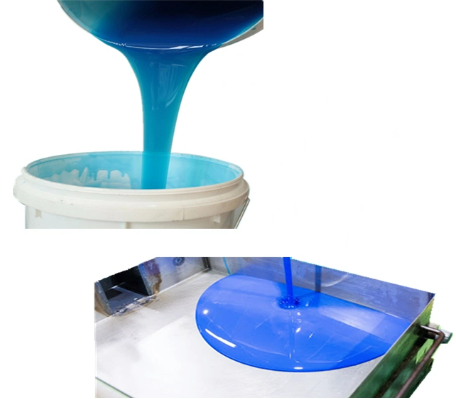
Choosing between liquid formulations and putty compounds dictates your entire workshop workflow. Let us break down when to use each material to maximize your efficiency.
Speed & Convenience
You do not need heavy degassing equipment or highly sensitive digital scales. You mix the material entirely by hand in minutes. It cures solid in under 30 minutes. Contrast this rapid pace against standard liquid silicones. Liquids typically require 12 to 24 hours to set fully. This impressive speed makes putty the absolute ideal choice for rapid prototyping and weekend craft sessions.
Limitation Realities
Putties work best for small to medium, shallow objects. Think about flat-backed jewelry components, textured wax stamps, custom buttons, or vintage coins. However, they are not scalable for high-volume factory manufacturing. You should also avoid deeply complex 3D objects featuring extreme undercuts. The thick, dough-like viscosity prevents it from flowing into microscopic deep crevices naturally.
Here is a quick comparison chart to guide your material decision:
Feature | Moldable Putty | Liquid Silicone |
|---|---|---|
Mixing Method | Hand kneading (1:1 ratio by volume) | Stirring by exact weight/volume |
Cure Time | 20–30 minutes | 12–24 hours |
Equipment Needed | None (Tool-free) | Scales, mixing cups, vacuum chamber |
Best Used For | Flat backs, shallow depth, texture stamps | Complex 3D shapes, high volume casts |
Food-Safe vs. Craft-Grade
Are you planning to cast chocolates, custom fondant shapes, or novelty ice? Your putty must explicitly state FDA food-safe compliance on the label. It also needs verified high heat resistance, often surviving up to 450°F. Never use standard craft putties for edible items. Standard craft-grade materials contain chemical curing agents considered toxic for human consumption. Always double-check the manufacturer label before touching food.
Compatibility
Ensure the cured mold supports your specific downstream casting material. You might cast epoxy resin, polyurethane, plaster, wax, concrete, or polymer clay. Most premium platinum-cure putties handle these heavy materials beautifully. Just verify the chemical compatibility if you plan on pouring aggressive, heat-generating urethane resins.
Proper physical setup separates a successful cast from a frustrating disaster. You need the right environment and an effective containment strategy before opening the jars.
Always utilize a well-ventilated area for your projects. While modern putties are generally user-friendly, you should avoid prolonged skin contact. Have dry paper towels and mild dish soap ready for hand washing immediately post-mix. Do not touch your eyes or face while handling the raw components. Keep the materials away from pets and young children.
Warning: Never use a silicone mat unless you coat it generously with a dedicated silicone mold release agent. We see this mistake constantly in maker communities. Silicone bonds chemically to itself. Glass, smooth acrylic sheets, or simple wax paper serve as much safer alternatives. They naturally release the cured rubber without initiating any chemical bonding.
Liquid silicones require rigid, leak-proof mold boxes. Putty technically does not require walls, but building a support form drastically improves your professional results.
The Deli Cup Method
Try this highly effective workshop trick. Cut the bottom off a standard plastic deli cup or disposable container. This creates a sturdy plastic "wall" around your original object. Leave roughly a 1/2-inch border of open space between your master object and the cup wall.
Purpose of the Containment Wall
Secure this wall to your smooth base using hot glue. This simple containment structure serves three vital purposes:
It prevents the dough from spreading out too thin when you apply heavy downward pressure.
It forces the dense material tightly against the master object to capture microscopic details.
It creates a perfectly flat, level top base for pouring your liquid casting material later.
Timing remains your biggest challenge here. Once Part A meets Part B, the irreversible chemical clock starts ticking. Read through these steps completely before you begin.
Measure equal parts exactly. You want a 1:1 ratio by volume. Use separate hands or dedicated measuring spoons to scoop the A and B components. If you use the same tool, you risk cross-contamination inside the primary jars. This minor mistake will ruin the entire batch over a few weeks, turning the top layers into hard rubber chunks.
You typically have a very brief 3-to-4-minute working time, commonly known as pot life. Keep in mind that warm hands will accelerate this timeframe significantly.
Smash the two parts together aggressively in the palms of your hands.
Vigorously knead the mixture for approximately one full minute.
Continuously fold the material over itself, pressing firmly to integrate the colors.
Success Criterion: The final ball must feature a solid, uniform color. You must see absolutely no color streaks or marbling. Streaks indicate unmixed material. Unmixed sections will remain perpetually sticky, ruining your master object and failing to cure.
Roll the fully mixed putty into a smooth, wrinkle-free ball. Now, you must apply it correctly to avoid trapping destructive air pockets.
The "Highest Point Down" Rule
Never just smash the ball flat directly over the entire object. Instead, press the putty onto the highest physical point of your original object first. Push downward and outward steadily with your thumbs. This specific sweeping motion forces air out of the deepest crevices. It prevents trapped bubbles from creating ugly raised bumps on your final casting surface.
Once covered completely, flatten the top of the putty against your work surface or inside your deli cup ring. A perfectly flat top ensures the mold sits perfectly level when you flip it over for casting.
Leave the entire setup undisturbed at room temperature. The chemical reaction generates slight internal heat. Let it sit for 20 to 30 minutes depending on your room temperature. Resist the urge to poke, prod, or peel it early. Disrupting the cure will warp your final mold geometry.
Basic flat-back objects pop out instantly. Complex geometries require a bit more mechanical strategy.
Most putties cure to around a 35A Shore Hardness. This stiffness provides excellent industrial-grade durability. However, this rigidity creates physical challenges. Harder silicone can make it extremely difficult to pop out originals featuring deep overhangs or intricate undercuts. The dense mold simply will not stretch wide enough without tearing.
Do not panic if your original object feels permanently trapped inside the cured block. You can use a clever workaround known as the cut and tape method to safely extract it.
Take a fresh, sharp precision craft knife or scalpel.
Carefully slice down one side of the mold, choosing a line that avoids crucial surface details.
Gently pry open the new slit and slide your original object through this opening.
When you are ready to cast your final material (like liquid resin or wet concrete), wrap the mold tightly. Use heavy-duty tape or thick rubber bands to reseal the seam perfectly so it does not leak.
Even experienced makers make devastating mistakes. Here are the two most common critical failures and how to handle them effectively.
Symptom: The putty fuses permanently to a silicone craft mat. It might also fuse aggressively to a pre-existing silicone mold you were trying to copy.
Recovery Protocol: Physical separation remains your only viable option. You need two people for this rescue mission. Both people must pull the fused pieces apart under high tension. While stretching the bond, use a sharp razor blade. Slice precisely along the color differentiation line between the mat and the new mold. Take your time. Once separated, you can patch small resulting surface holes with fresh putty. Always use a generous layer of spray release agent next time!
Platinum-cure silicones are highly sensitive to specific environmental chemicals.
Symptom: The putty remains sticky, gooey, and entirely uncured directly against the master object, even after an hour of waiting.
The Cause: Certain materials chemically inhibit the curing process. Common culprits include sulfur-based modeling clays, natural latex gloves, and specific UV-cured resins from 3D printers.
Prevention: Always test a tiny, pea-sized amount of putty on a hidden area of your master object first. Wear nitrile gloves strictly instead of latex. If your original object is a 3D-printed UV resin part, you must coat it heavily with an acrylic clear spray paint and let it dry completely before molding.
Moldable silicone putty streamlines the custom casting workflow beautifully. It trades the absolute microscopic precision of liquid silicone for unmatched speed, easy accessibility, and a complete zero-tool setup. You can move from a bare original object to a ready-to-use production mold in under 45 minutes without breaking a sweat.
As you plan your next creative project, follow these actionable next steps:
Assess your primary medium: Strictly separate your food-safe baking projects from your chemical resin casting projects. Buy dedicated product lines for each.
Prioritize physical durability: Shortlist high-durability, platinum-cure options that feature a verified 30-minute cure time.
Protect your existing tools: Always purchase compatible mold release agents if you plan to work within an existing silicone ecosystem or on silicone mats.
A: No. Once the two-part chemical reaction occurs and the putty sets, it cannot be melted down or reformed. The chemical reaction creates a permanent thermoset elastomer. The resulting mold, however, is incredibly durable. You can use it repeatedly for hundreds of individual casts with resin, clay, concrete, or wax.
A: This is usually caused by either an inaccurate 1:1 mixing ratio or inadequate kneading that leaves unmixed streaks. Cure inhibition is another common culprit. Interacting with sulfur-based modeling clay, latex gloves, or certain UV resins on the master object prevents the platinum catalyst from activating properly.
A: Yes, provided the specific brand of putty is explicitly rated for high heat. Many premium food-grade and craft putties easily withstand temperatures up to 400°F to 450°F. Always verify the manufacturer's maximum heat resistance threshold on the packaging before placing the cured mold into a hot oven.


