Views: 174 Author: Site Editor Publish Time: 2026-05-18 Origin: Site


Custom molds serve as the backbone for rapid prototyping, concrete casting, and part replication. Creators often hit a wall when commercial two-part silicone systems become too expensive for large or iterative projects. You need a scalable solution to keep production moving.
Fabricating your own Silicone putty offers a highly adaptable, low-cost alternative. Makers often call this mixture "Oogoo" or proto-putty. Choosing between a DIY recipe and commercial kits requires strict assessment. You must weigh project fidelity, safety compliance, and structural needs before mixing materials.
This guide provides an evidence-based formulation protocol for creating DIY moldable silicone putty. We will outline defect-resolution frameworks to troubleshoot common failures. You will also learn exact criteria for when to abandon DIY approaches in favor of commercial two-part systems.
DIY silicone putty relies on mixing 100% acetic-curing silicone with cornstarch, which acts as both a binder and moisture-carrier to initiate deep curing.
Adjusting the cornstarch-to-silicone ratio directly dictates the final Shore hardness and tensile strength of the mold.
DIY formulations are strictly non-food-grade and release acetic acid during curing; proper ventilation and PPE are non-negotiable.
For high-precision artifact replication or consumable food molds (chocolate, ice), commercial FDA-compliant two-part putty is the only verifiable solution.
You must frame your decision criteria before investing time in formulation. Assessing project constraints early prevents wasted materials and failed castings. We evaluate these paths across three core dimensions.
DIY formulations drastically reduce raw material expenses. This makes them highly viable for large-scale, low-fidelity molds. Garden concrete casting serves as a prime example. You can buy bulk caulking tubes and standard grocery starch for a fraction of the price of specialized mold-making supplies. Commercial kits carry a premium price tag. They do not scale well for massive, heavy-volume pours unless you have a high commercial budget.
The chemical reactions driving these two systems differ entirely. This dictates your working time and demolding schedule.
DIY Formulation: This process relies on atmospheric moisture. It also uses the inherent moisture trapped inside cornstarch. Working time remains highly variable. High ambient humidity accelerates the cure. You might have only a few minutes to work before the material stiffens.
Commercial 2-Part Systems: These utilize precise platinum or tin chemical catalysts. They ensure highly predictable working times. You usually get 3 to 5 minutes of pot life. Demolding reliably occurs within 20 to 30 minutes. The chemical catalyst does not rely on room humidity.
Safety compliance establishes a hard boundary between these options. Standard construction silicone remains toxic until it becomes fully inert. You cannot use it for consumable items. Commercial two-part putty becomes mandatory if your end-goal is a food-grade mold. Do not compromise on this safety standard.
Feature Category | DIY Silicone Formulation | Commercial 2-Part Kits |
|---|---|---|
Primary Cost | Extremely Low | High Premium |
Cure Trigger | Moisture (Cornstarch/Air) | Platinum/Tin Catalyst |
Working Time | Variable (Humidity Dependent) | Fixed (Highly Predictable) |
Food Safety Status | Strictly Non-Food Grade | FDA-Compliant Options Available |
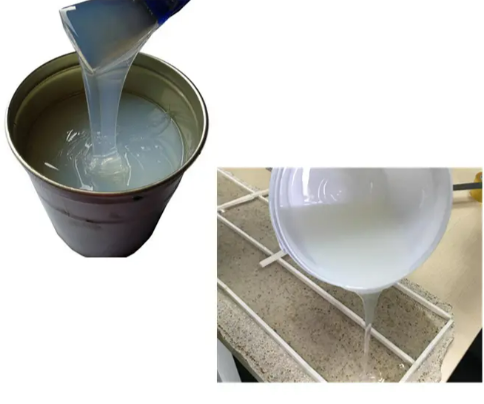
You need specific materials to succeed. We outline the exact substrates below. We also emphasize chemical realities and necessary safety controls.
You must procure 100% clear silicone caulk. Avoid any products labeled as "paintable" or acrylic blends. These will fail to cure properly. Always check the safety data sheets (SDS). You are looking for an acetic curing silicone. You can easily identify this type by its strong vinegar odor. Products like GE Silicone 1 often fit this category perfectly. This chemical makeup ensures proper cross-linking when mixed.
Cornstarch serves as your primary modifying agent. Raw silicone behaves like a sticky fluid. Cornstarch mitigates this inherent tackiness. It acts as a mechanical filler. More importantly, it provides the internal moisture required to cure the compound evenly. Without it, thick silicone structures would only cure on the outside. The center would remain a wet paste for weeks.
Silicone permanently adheres to cured silicone. It also binds aggressively to porous substrates. Implementing a mold release agent is an absolute requirement. You have several options depending on your master object.
Vaseline (Petroleum Jelly): This provides optimal viscosity for general molds. It applies quickly and forms a solid barrier.
Beeswax and Oil Blend: This combination is preferable for preserving delicate micro-textures. It flows into small crevices without obscuring surface details.
Mixing acetic curing silicone releases concentrated acetic acid vapor. You will notice a harsh, stinging smell. Mandatory safety requirements include setting up a well-ventilated workspace. Work outside if possible. You must wear nitrile gloves. Use disposable mixing surfaces like cardboard or silicone mats. Never mix these chemicals near food preparation areas.
We provide a pragmatic, process-driven standard operating procedure. Follow these phases sequentially. This ensures you combine materials safely and effectively.
Phase 1: Substrate Preparation. Dispense your required volume of silicone. Place it directly into the center of a mound of cornstarch. Assumption check: The raw silicone will immediately stick to any surface not thoroughly coated in starch. Keep your gloves dusted at all times.
Phase 2: The Binding Process. Incorporate the cornstarch into the silicone. Use a gentle folding technique. Treat it like kneading pasta dough. Roll the silicone over itself. Press it into the dry powder. The goal is to transition the compound. It will change from a wet adhesive paste to a workable, non-tacky dough.
Phase 3: Texture and Catalyst Additives (Optional). You can integrate liquid food coloring at this stage. This acts as a mild moisture catalyst. It dramatically accelerates the curing process. It also provides visual confirmation of a uniform mix. Once the color looks solid, you have eliminated unmixed pockets.
Phase 4: Applying to the Master Object. Press the moldable silicone putty firmly over your master object. Implementation Risk: Failure to apply steady, uniform pressure will result in bridging. Bridging creates unfilled voids around complex geometries. Work the material into deep recesses first. Then build up the outer thickness.
You can engineer this material for specific outcomes. Adjusting your input ratios directly changes the final physical properties.
The Shore A scale measures rubber hardness. You can manipulate this by changing your modifying agent volume.
Increasing the cornstarch ratio yields a highly rigid mold. It cures extremely fast. This firm texture proves suitable for high-density casting. You would use this for concrete or heavy plaster. The rigid walls prevent the mold from bulging under weight.
Decreasing the starch ratio retains the native elasticity of the raw silicone. You require this flexibility for complex master objects. Molds featuring deep undercuts must stretch significantly during demolding. Too much starch will cause these flexible molds to tear during object removal.
This DIY formulation lacks high tensile tear-strength. Commercial liquid mold rubbers easily outperform it here. Thin-walled DIY molds require external structural support. We call this a mother mold. You can build a mother mold using plaster bandages or fiberglass. You place this rigid shell over the silicone before demolding. It holds the soft putty in perfect alignment. This prevents distortion when casting heavy liquid materials.
Starch-to-Silicone Ratio | Shore Hardness Impact | Ideal Application Profile |
|---|---|---|
High Starch (e.g., 2:1 or 3:1) | Highly Rigid, Brittle | Flat objects, concrete pavers, shallow details |
Equal Ratio (1:1) | Moderate Firmness | General prototyping, resin casting, smooth shapes |
Low Starch (e.g., 1:2) | Highly Elastic, Soft | Deep undercuts, complex geometries, delicate masters |
Projects sometimes fail during the first attempt. We provide a robust troubleshooting framework. Use this to fix common implementation failures quickly.
Demolded putty sometimes reveals trapped air bubbles. You might also notice missing surface details. The mold is not ruined. Silicone bonds natively to cured silicone. You can mix a micro-batch of fresh putty. Press it directly into the void. This repairs the broken geometry. The new batch cross-links seamlessly into the existing mold wall. Let it fully cure before attempting another cast.
Sometimes the mold remains tacky after 24 hours. This indicates a chemical stalling issue. The formulation likely lacked sufficient internal moisture. You did not use enough cornstarch. Alternatively, you exposed the mixture to extreme low-humidity environments. Winter heating systems often dry out indoor air. To fix this, you must mix a fresh batch. Increase your cornstarch volume slightly. You can also add one drop of liquid food coloring to jumpstart the moisture reaction.
The putty occasionally locks onto the master model. This destroys both the mold and the object during removal. This happens when the release agent proves insufficient. It also occurs if your master object is highly porous. Unsealed wood soaks up silicone quickly. 3D-printed PLA models feature pronounced layer lines. These tiny ridges create mechanical locks. Always seal porous objects using acrylic spray paint. Apply generous petroleum jelly to rough surfaces before molding.
We must direct you to the correct final decision. Evaluate your risk tolerance against your project requirements. Use these scenarios to determine your best path forward.
You should formulate your own mixture if specific conditions align. Choose this route if your casting material is concrete, standard resin, or wax. Proceed if the master object lacks fragile micro-details. DIY putty works perfectly when project budget constraints serve as your primary driving factor. You will achieve excellent results for hobbyist tasks, cosplay armor detailing, and garden masonry.
You must abandon the DIY approach under strict professional circumstances. Buy commercial products if you require guaranteed FDA food-safe compliance. You cannot risk contamination when molding chocolate, fondant, or custom ice cubes.
You also need commercial kits if the project demands exact dimensional stability. DIY mixtures experience slight shrinkage as the acetic acid evaporates. Commercial platinum-cure silicones exhibit zero shrinkage. Finally, purchase commercial kits if you operate in a professional environment. Commercial spaces cannot tolerate intense acetic acid outgassing near employees or clients.
Formulating your own putty bridges the gap between expensive commercial tool-making and accessible prototyping. You can achieve remarkable casting results by controlling moisture ratios and applying proper release agents.
Run a calibration test: Always mix a small-scale test batch to gauge cure times and flexibility ratios. Do this before committing material to a critical master object.
Control your workspace: Ensure rigorous ventilation to manage acetic acid vapors safely.
Respect material limits: Upgrade to commercial two-part kits immediately if your project involves food contact or requires zero shrinkage.
Seal your masters: Prevent mechanical locking by sealing porous surfaces like wood or 3D-printed plastic before applying your mixture.
A: Standard 100% silicone utilizes an acetoxy curing system. As it reacts with atmospheric moisture to vulcanize (harden), it off-gasses acetic acid as a byproduct. This chemical process creates the strong vinegar odor. You must work in a well-ventilated area until the curing process finishes completely.
A: No. Construction-grade silicone contains industrial solvents and biocides that are strictly non-food-safe. These chemicals can leach into consumable items. Food applications mandate platinum-cure commercial silicone putty. Always look for explicit FDA food-safe labeling when casting edible materials.
A: Yes. Fully cured silicone is highly resistant to the alkaline nature of Portland cement and rapid-set concrete. This resistance makes it an excellent, durable choice for masonry casting. It will not degrade rapidly like some latex or cheap urethane molds when exposed to high pH levels.
A: The moisture content in your cornstarch or added liquid colorants was too high. Ambient humidity also accelerates the chemical reaction significantly. To extend your pot life, reduce the amount of starch in your mix. You can also chill the raw materials slightly before blending.


